In RODC environment one of the great feature is the password replication. in RODC environment we can determine which passwords need to be cache in RODC and which accounts still need to be authenticate via writable domain controller. As example domain administrator accounts do not need to be cached on RODC. its always safe if it can be authaticate via routable DC for security purposes. so if a domain administrator login from a RODC enviornment, we can set system to forward the authtication request or service ticket to the writable domain controller.
Microsoft made this easy by introducing password replication policy (PRP) to RODC environment. by default system create domain-wide password replication policy two domain local security groups.
Allowed RODC Password Replication Group : Members of this group will allow to cache passwords in RODC. by default this group do not have any members.
Denied RODC Password Replication Group: Members of this group are deny to cache passwords in RODC. Some of the groups which are security critical are member of this group by default such as Administrators, Server Operators, Backup Operators, Account Operators.
One of the biggest mistakes administrator do is only allow/deny user accounts. But computers it self also uses authatication and service tickets requests. so make sure you add computer accounts also in to these lists.
How to configure RODC password replication policy(PRP) ?
1) Login to a writable domain controller with domain administrator account
2) Open "Active Directory Users and Computers" snap in by Server Manager > Tools > Active Directory Users and Computers
3) Go to "Domain Controllers" OU
2) Open "Active Directory Users and Computers" snap in by Server Manager > Tools > Active Directory Users and Computers
3) Go to "Domain Controllers" OU
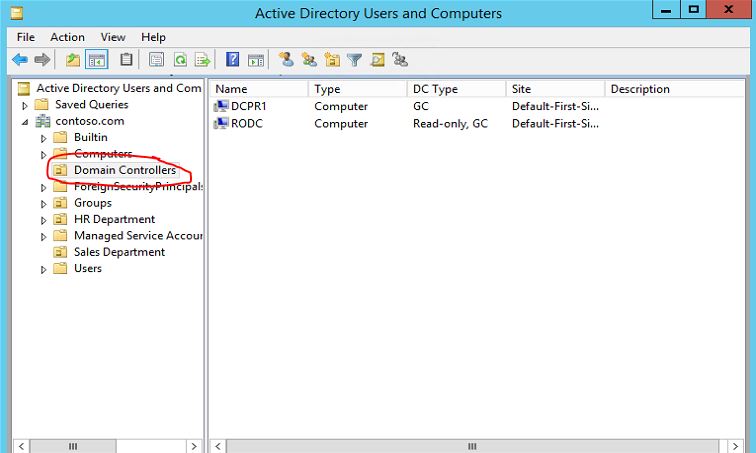
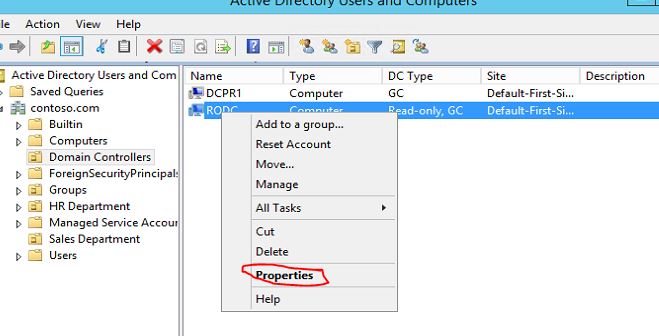
4) Click to select the RODC you need to configure PRP. Then right click and click on properties.
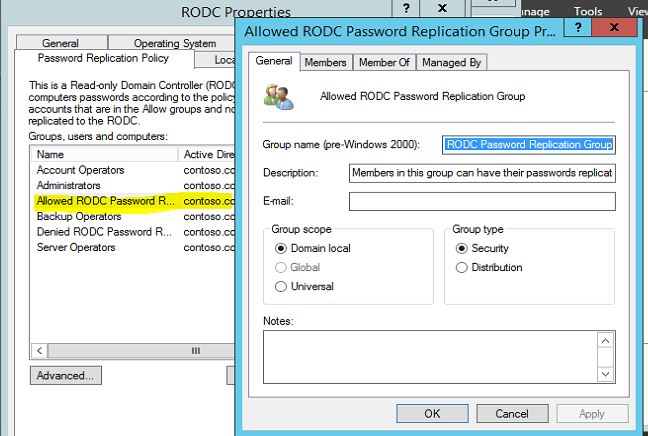
5) In the properties window click on "Password Replication Policy" tab
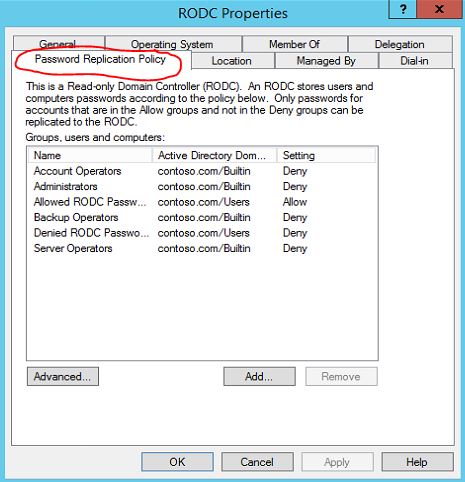
6) In there we can see the 2 groups i mentioned above.
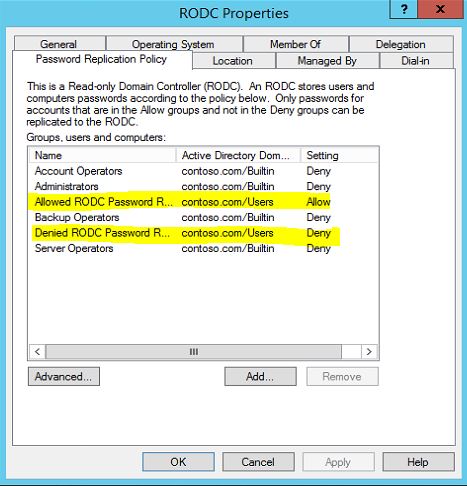
7) We can add users to these groups. to add users/computers to those double click on the group. in here i will use "Allowed RODC Password Replication Group"
8) To add users/computers to group click on members tab and click on add.
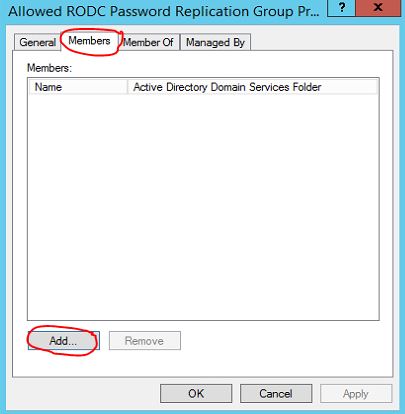
9) Once users/computers added click on "OK" to apply changes.
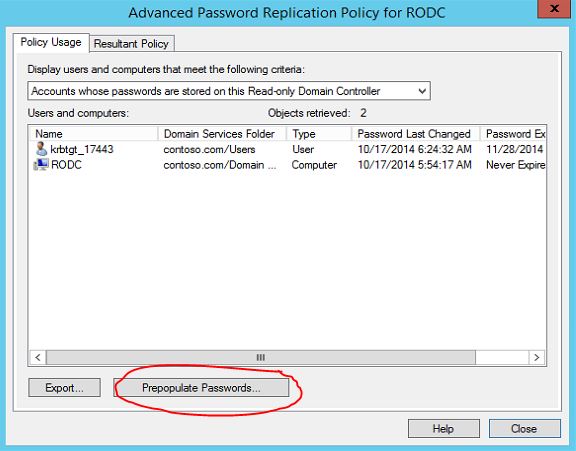
Policy Usage Reports and Pre-Populate Credential Caching
Microsoft provided a easy method of reporting where we can check the status of password replication. in order to use this facility need to follow following steps.
1) Login to a writable domain controller with domain administrator account
2) Open "Active Directory Users and Computers" snap in by Server Manager > Tools > Active Directory Users and Computers
3) Go to "Domain Controllers" OU
4) Click to select the RODC you need to configure PRP. Then right click and click on properties.
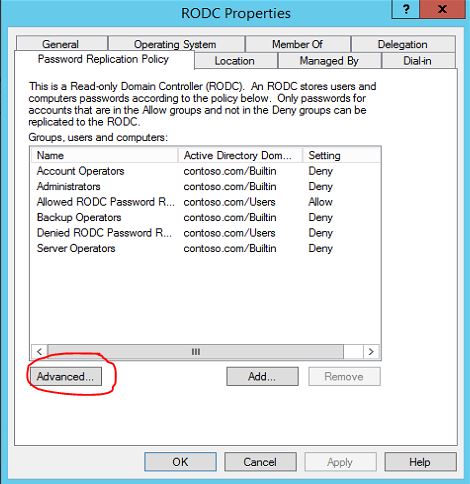
5) In the properties window click on "Password Replication Policy" tab
6) Click on "Advanced" button
2) Open "Active Directory Users and Computers" snap in by Server Manager > Tools > Active Directory Users and Computers
3) Go to "Domain Controllers" OU
4) Click to select the RODC you need to configure PRP. Then right click and click on properties.
5) In the properties window click on "Password Replication Policy" tab
6) Click on "Advanced" button
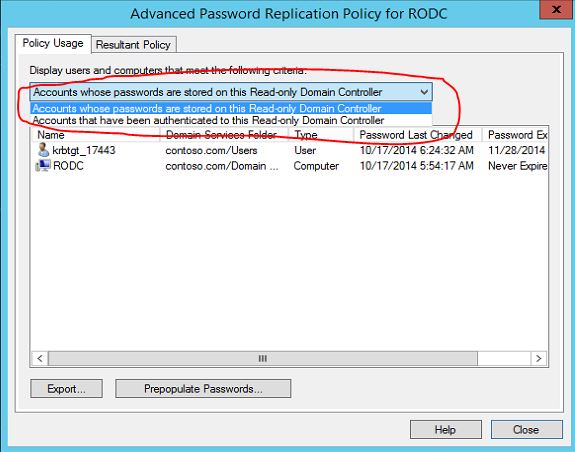
7) In here drop-down list there is 2 options listed
Accounts Whose Passwords Are Stored On This Read-Only Domain Controller: This option will list all the user accounts/computer accounts which are currently cached password on RODC.
Accounts That Have Been Authenticated To This Read-Only Domain Controller: This option will list the user accounts/computer accounts which were forwarded to writable domain controller for authentication and service tickets process. This is good place to identify the user accounts/ computer accounts which will still need to add to allow list for password caching.
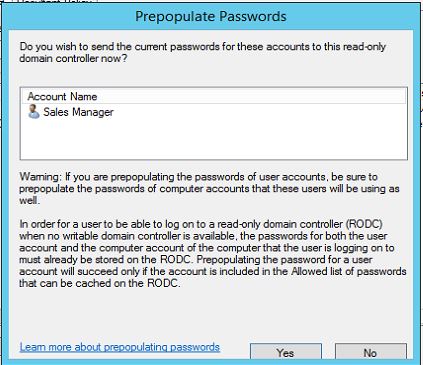
In PRP lets assume we allowed USER A to cache his credentials in RODC. But it will not cache it right away. it will cache credential once user made first authentication request to the RODC. but microsoft given opertunity where we can pre-populate the caching. so when user login first time his password is already been cached on RODC.
In order to use this feature click on "Pre-Populate Passwords…" button in same advance window.
It will open up window where you can select the accounts you need. once its selected it will pop-up following information window. click on yes to accept the changes.
before do this make sure you have already allow that user/computer account in Allow list of password caching.
before do this make sure you have already allow that user/computer account in Allow list of password caching.
if you have any questions please feel free to contact me on rebeladm@live.com
STEP-BY-STEP GUIDE TO INSTALL READ-ONLY DOMAIN CONTROLLER (RODC)
In previous post i have explain what is RODC and the benefits of it. If you not read it yet you can find it in here.
Before install a RODC in a domain environment it need to meet the following requirements,
- Forest function level should be windows 2003 server or higher
- Needs at least one writable domain controller running windows server 2008 or higher
If forest have any DC running windows server 2003 we need to adjust permissions on DNS application directory partition to allow them to replicate to RODC. It can be done by running adprep /RODCprep from windows 2012 server installation disk \support\adprep folder.
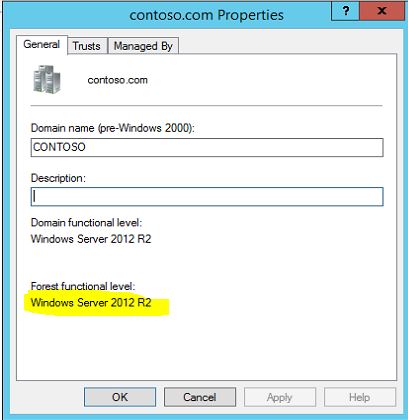
In my demo setup i do have a domain called contoso. Before start lets check the forest function level.
- To do that, log in to the DC as domain admin and open "Server Manager"
- Then from tools click on "Active Directory Domains and Trust"
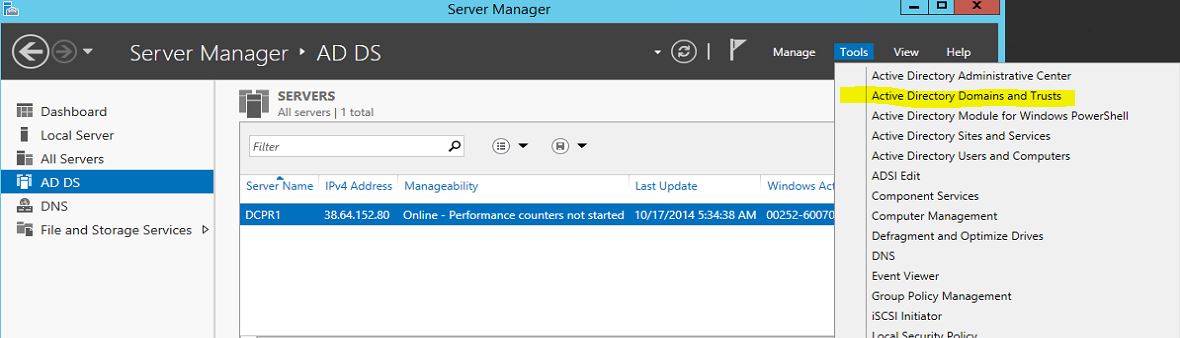
- Right click on domain and select "Properties"
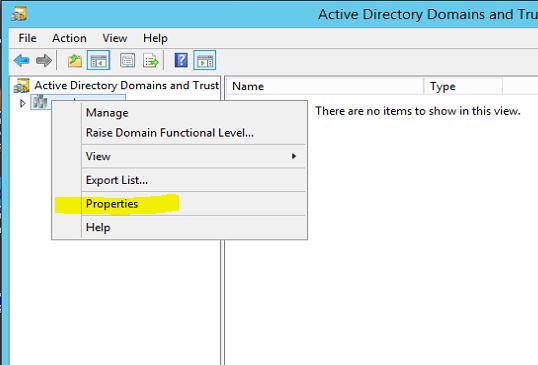
As we can see here its runs with windows server 2012 R2 so we do not need to prepare domain with adprep /RODCprep
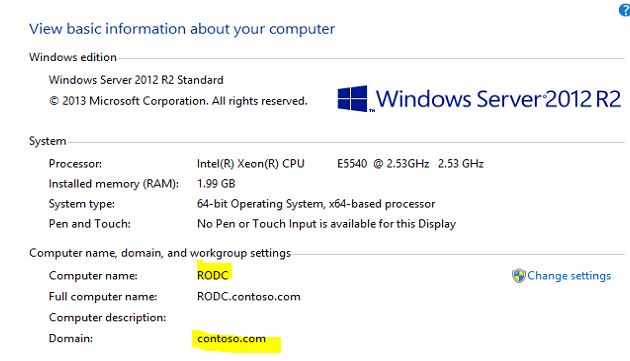
To install RODC i have a fresh installed windows 2012 R2 server and its already added to the domain. (Here i do not going to explain how to add it to domain as in previous in my posts i explain how to add server to a domain)
- To begin the setup first make sure you login as a domain administrator to the server.
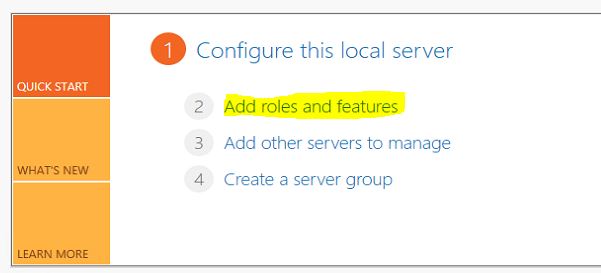
- Open "Server Manager" and from dashboard window click on "Add roles and features"
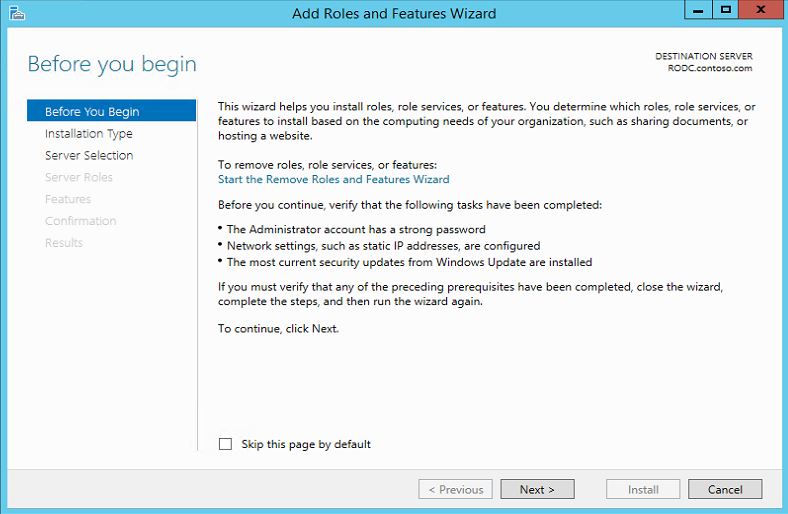
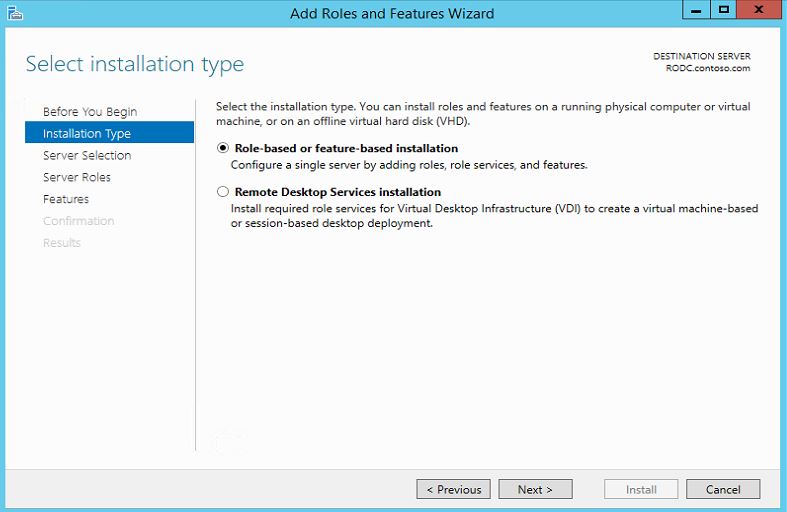
- It will open up the wizard and click on "next" to continue.
- In next window select "Role-based or feature-based installation" and click next
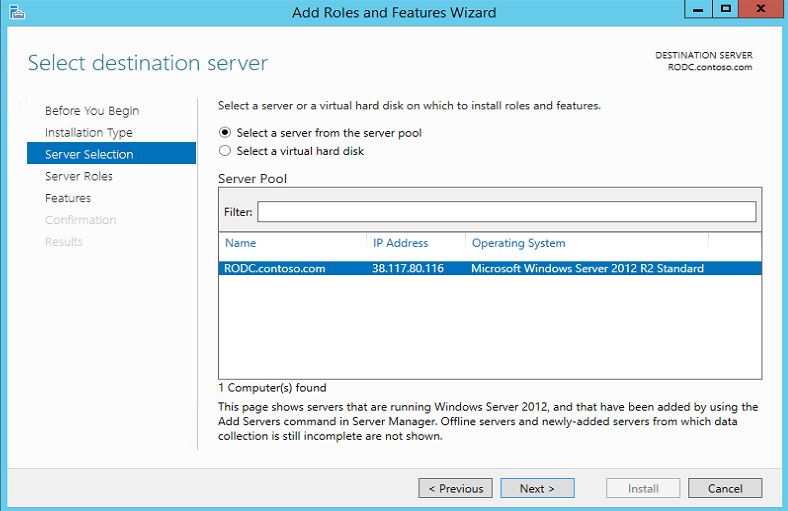
- In next window by default it select the current server and click next to continue
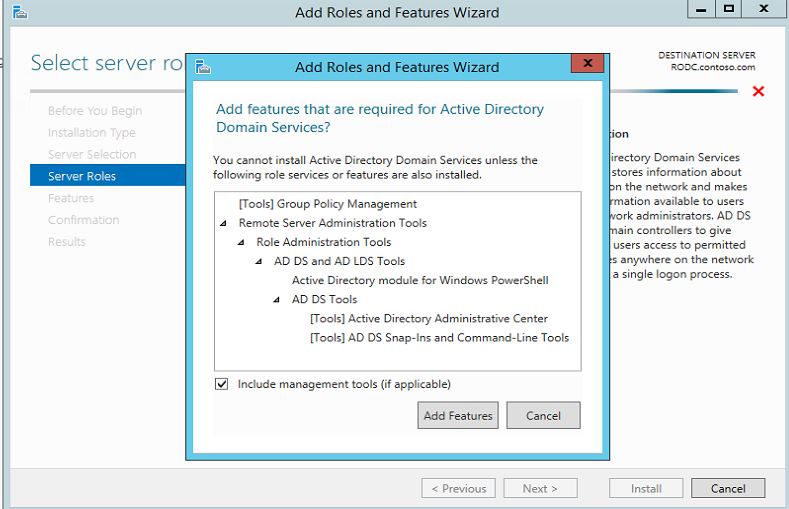
- In next window click on "Active Directory Domain Service" and it will pop up with the features. click on "add features" to continue and then "next"
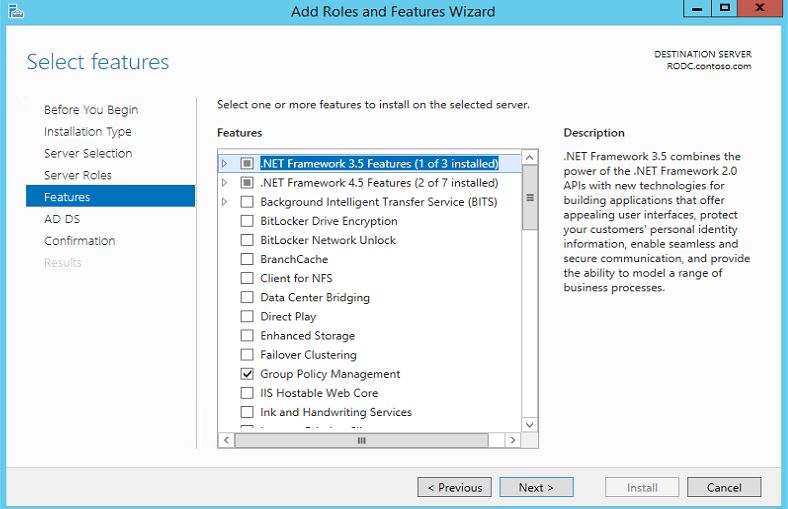
- In next window will let it run with default features. click on next to continue
- In next window it will gives brief description about the AD DS and click next to continue
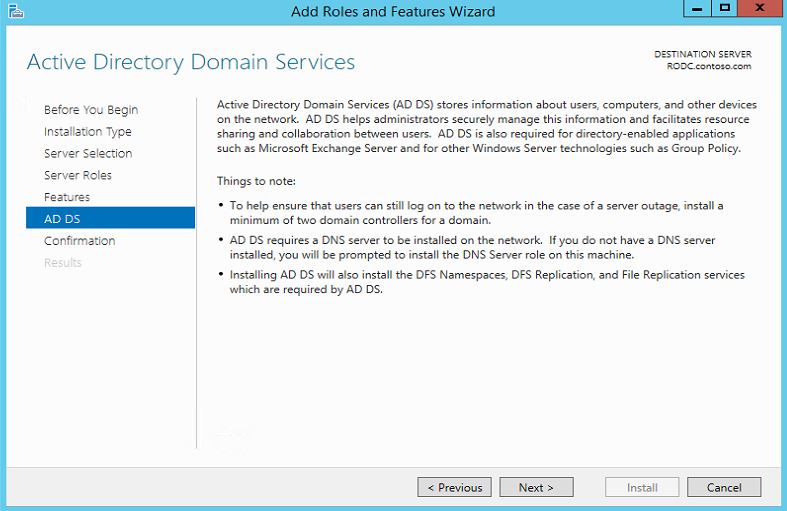
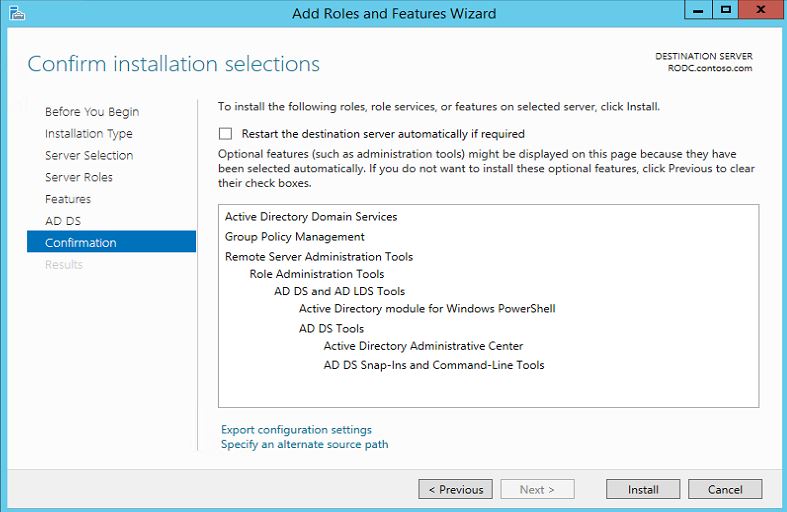
- Next window it will ask for confirmation and click ok "install" to begin the service installation
- Once installation done open "Server Manager" and click on "AD DS"
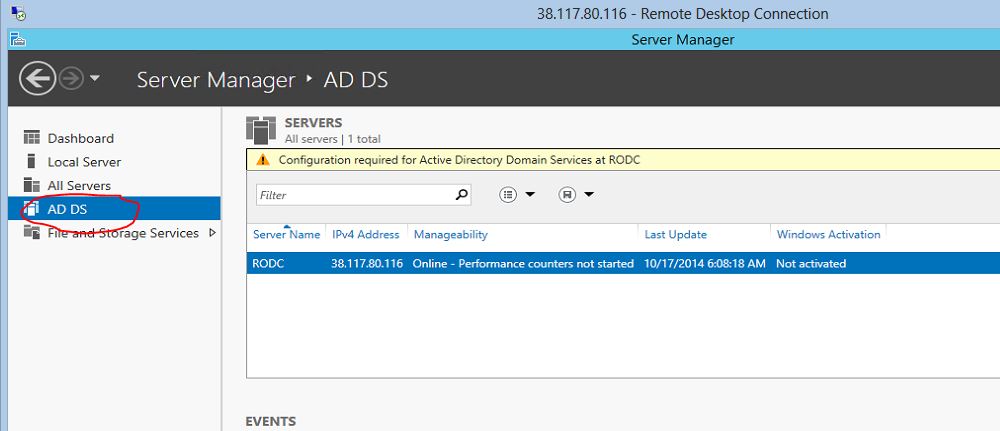
- Then in right hand side panel click "More" as in image

- Then it will open up the wizard and click on option "Promote this server to a domain…"
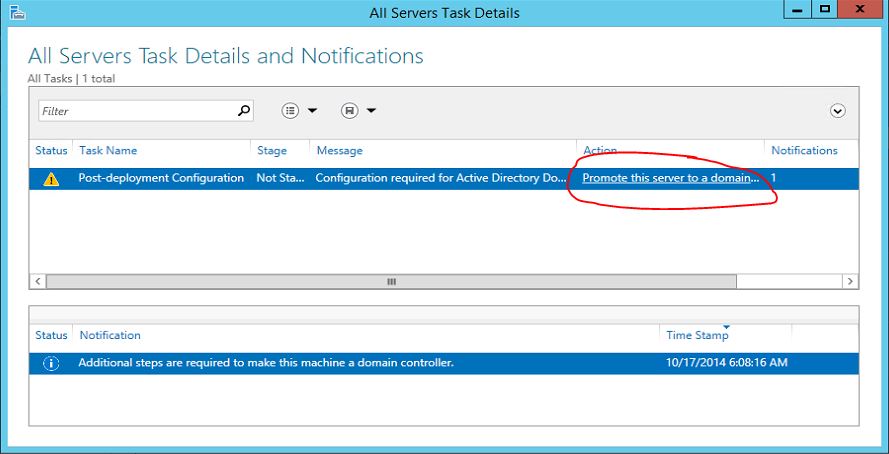
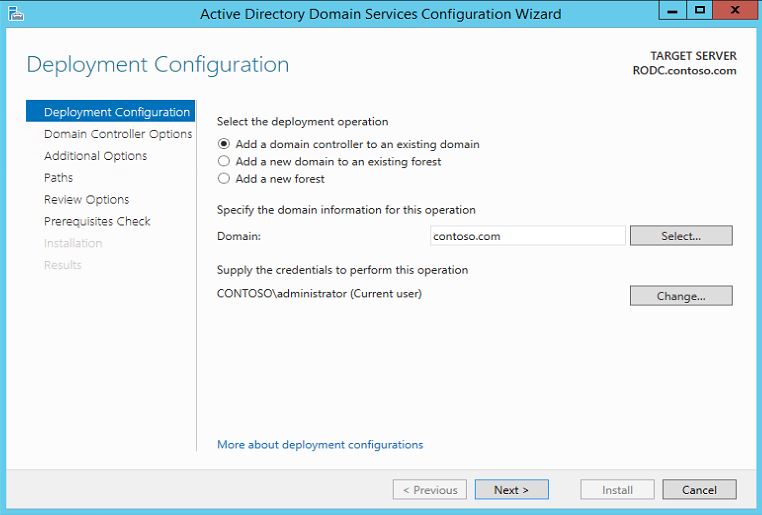
- It will open up the configuration wizard. in here we will keep the default selection and click on next to continue
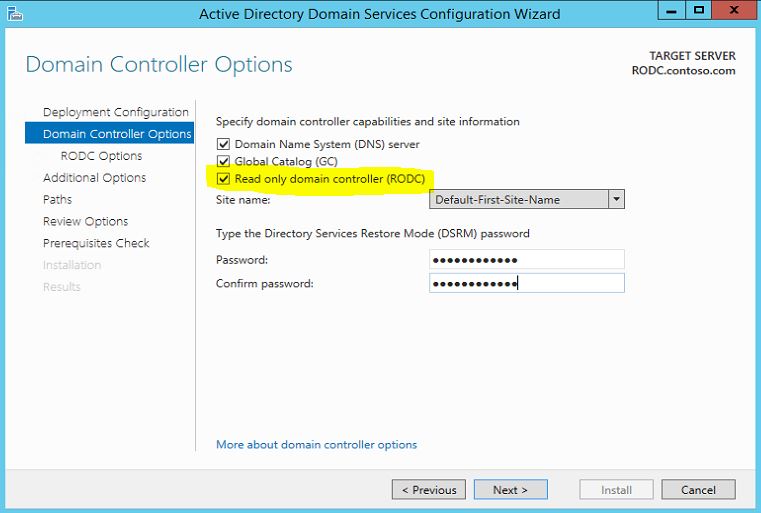
- In next window make sure to select option "Read only domain controller(RODC)" and then also type a password for restore. click on next to continue
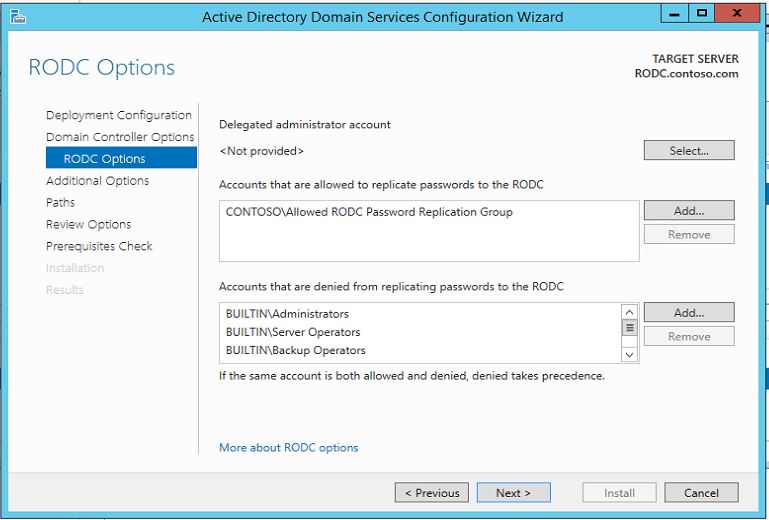
- In next window we can select what groups/users allowed for the password caching, what group/users denied for caching and also delegated admin accounts. in here for now we will keep the default selection.
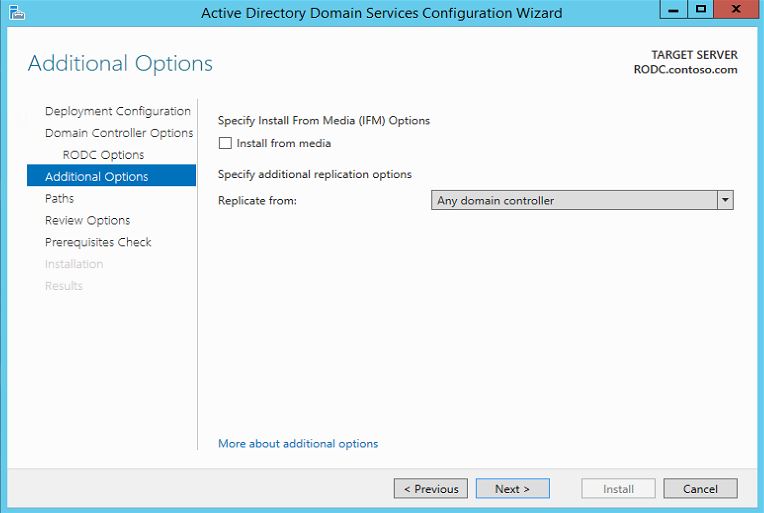
- in next window we can define from which DC we need replication done.
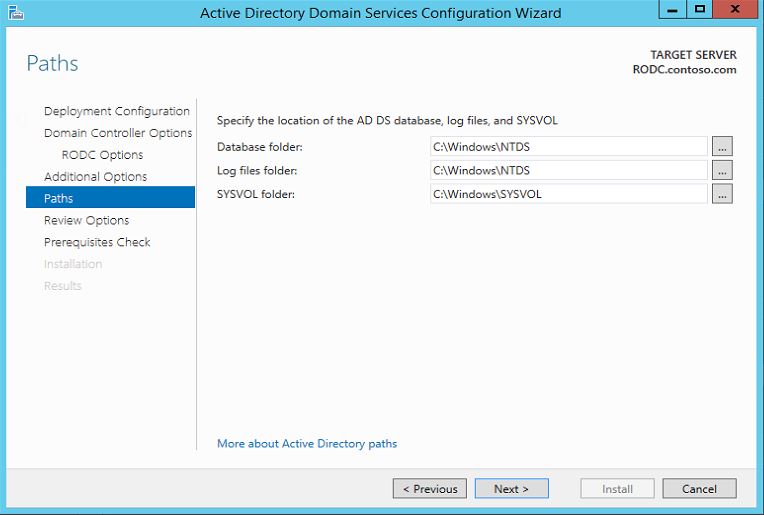
- In next window it gives option to change the folder paths. in here we keep default. click next to continue.
- In next window it gives option to review the installation selection and click next to continue.
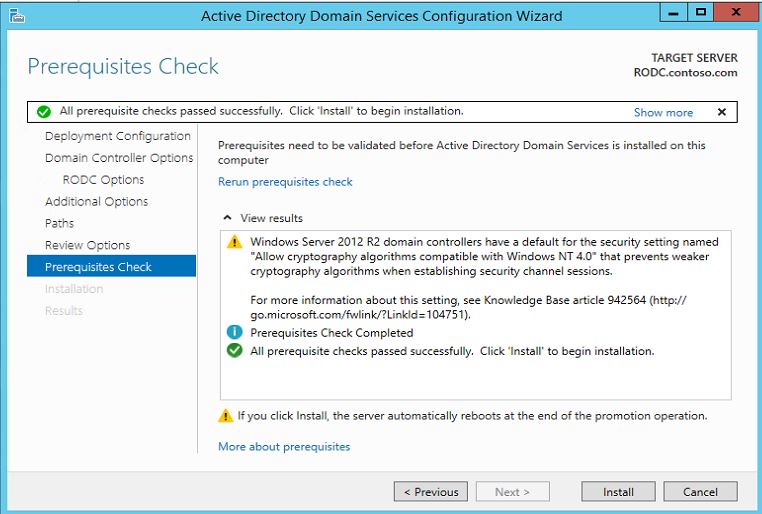
- In next window system will check if its meet all the prerequisites for the installation. click on Install to begin the installation
- Once installation done system will automatically reboot.
This completes the installation of RODC in domain. in next post we will look in to configuring RODC with different policies.
WHY READ-ONLY DOMAIN CONTROLLERS (RODC) ?
In enterprise level network its common to have HQ(Head Quarters)-Branch Office network. These branch offices may required to connected with HQ resources for its operations. Most of the time this kind of setup uses WAN links to connect branch Offices with HQ network. Let's assume we have company called ABC and its HQ is located in Canada Toronto. Due to the Expansion its need branch office open in London, UK. So the requirement is more complicated as its 2 different countries.
The users in London office still need to authenticate the company domain environment and access the resources. Let's Look in
to some of the difficulties, challenges faces with typical this kind of setup.
Lack of Resources
The users in London office still need to authenticate the company domain environment and access the resources. Let's Look in
to some of the difficulties, challenges faces with typical this kind of setup.
Lack of Resources
To connect HQ with branch site its required secure, reliable connection. But these connections typically comes with high $$$$ cost. Even though its cost mostly these links will be with speed of 128kb, 256kb, 512kb etc. If users in branch site is authenticating company AD it will use WAN link for the all the authentication, resources access etc. if the number of users increase in branch site the link utilization just for the AD activities will increased. Also since its between different geographical locations, different ISP, many facts will affect the reliability of the link as well. what happen if the WAN link went down on critical business day ? so solution is to deploy AD in branch site and it will be opening whole different range of concerns, problems.
Security Risks
Even though branch office dc will increase the authentication and resource access process its open potential security risks to the network. some companies will have fully secure datacenter facilities in branch sites as well but majority cant afford such investments. As we know regular DC is keeping critical data about users, resource authentications etc. what if these branch office dc get compromised or stolen?. It will affect entire company network operations and some time this kind of issue can cause millions of dollars lost to the company.
Management
If we host a branch site DC, typically it will required maintenance time to time. it may be to deploy fail over dc, upgrade hardware, site-link changes, user credential changes etc. So some time company may need to keep a IT department running on branch office which will increase the company operation cost. Also since its integrated directly with main domain environment, any changes triggers in branch office DC will also directly affect entire domain environment.
So what is the answer then ?
With windows 2008 server Microsoft introduce the Read-Only domain controller feature to specially address these difficulties company face in this kind of branch site scenario.
Read-Only!!!!
Read-Only!!!!
As its name says its by default Read-only copy of the company main DC. So the changes making on branch site RODC will not affect DC operations. So basically its keep all the info about the DC attributes in Branch-DC as read-only copy and once its receive request for authentication it directs the request to the RODC instead going via WAN link.
Password Replication Policy (PRP)
We can also control this "credential caching" in detail level by using Password Replication Policy. what it does is we can define which users, group need the credential caching on that particular RODC. For example let's assume we have another branch in India. The users in India office will not login from London office anyway. so why we should cache credential info for India office users in London office RODC ? Also in this way it improve security of dc more. So if one of branch office RODC compromised it will only hold limited data about the DC.
In windows 2012 server to configure we can use 2 security groups it creates with RODC setup. According to Microsoft its as following,
Allowed RODC Password Replication Group : Members of this group are placed in the Allow list of the Password Replication Policies of all RODCs by default. This group has no members when Windows Server 2012 is first installed.
Denied RODC Password Replication Group: Members of this group are placed in the Deny list of the Password Replication Policies of all RODCs by default. Some of the groups include Administrators, Server Operators, Backup Operators, Account Operators, and Denied RODC Password Replication Group.
Local Administrators Group
Some time the branch offices need some IT support for their users. It may have local IT staff or outsourced IT company for this. In typical DC environment to do the maintenance a particular user need to have domain admin rights or delegated permissions. But in RODC we can define Local administrator accounts which will give full control over the RODC environment and it still will not affect the parent DC setup.
In next post will look in to the configuration of a RODC.
APPLOCKER PART 2
This is the Part 2 of the AppLocker series. If you still not read the Part 1 you can find it in here.
In Part 1 i have explain what is "AppLocker" and use of it. Lets look in to furthure in to this nice feature.
As explain in part 1 in group policy applocker container there are four nodes called executable rules, windows installer rules,script rules and packaged app rules. in each of these containers we can allow or block applications based on 3 criteria.
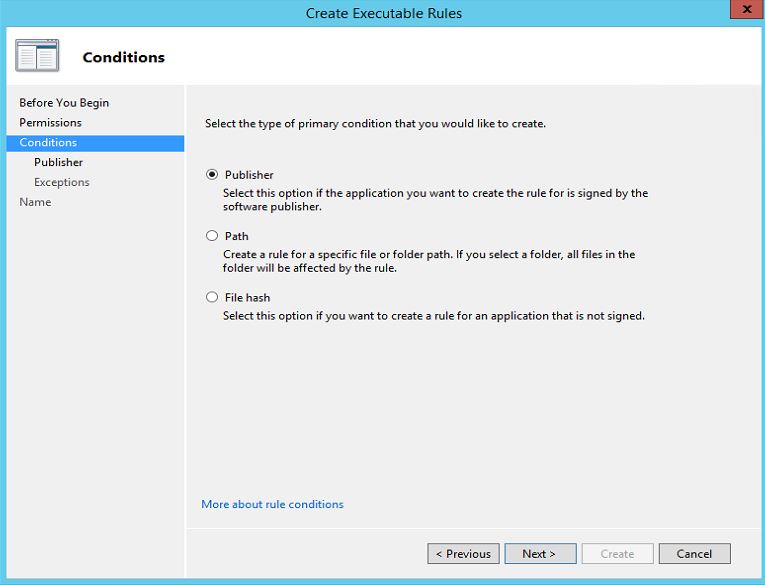
Publisher: Using this criteria we can block or allow applications based on its digital signature publish by the software publisher.
Path : Using this criteria we can block or allow applications based on the specific folder or file path. This type of rules kind of risky as if we given a folder path, any files in that particular folder affects from this rule.
File Hash: This criteria is apply to allow or block applications which is not digitally signed. it works based on digital fingerprint of the application and it will work even name or the location of the application change.
Before AppLocker rules get to work you need to make sure "Application Identity" service is running. by default it is not. so make sure you start the service and set its startup type to "Automatic"

Default Rules
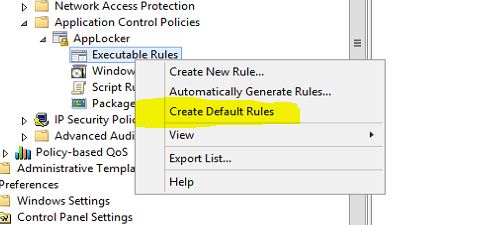
By default Applocket will block every package, file and script except the stuff which is allowed using rules. But as we know windows system it self need files, applications, scripts etc. to run by default. it is not practicle to create rules manually for each of these. Microsoft made this easier by introdusing "Default Rules". by creating default rules in each of four containers will create the required rules which system needs it self. These rules can simply create by using following steps,
1. Right click on each container.
2. Click on option "Create Default Rules" from the list
2. Click on option "Create Default Rules" from the list
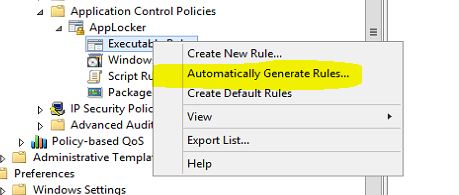
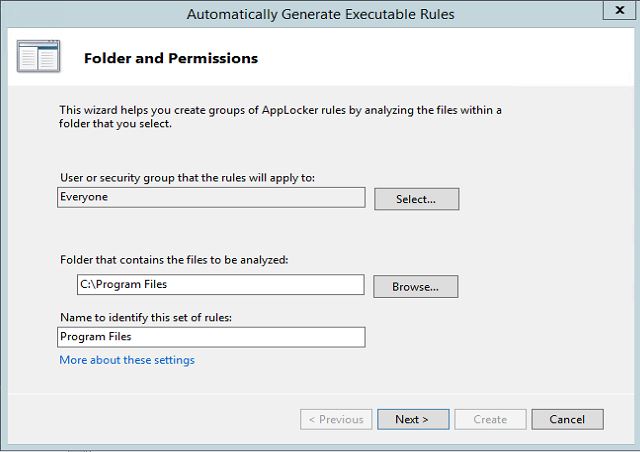
Automatically Generate Rules Wizard
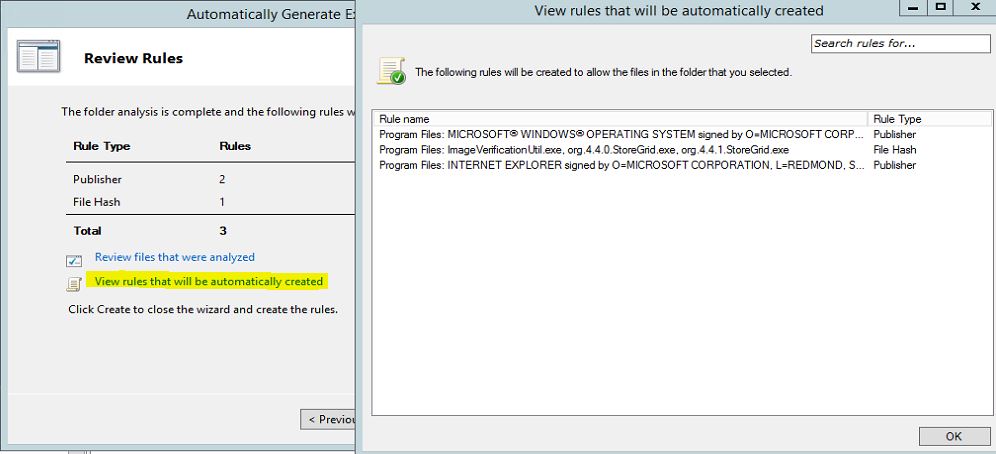
One of the grate option of applocker is its allow you to generate rules using wizard automatically. once you specify a folder path, permission groups it will automatically analyze the selection and generate the rules. then it will give you ability to review them and change them if required before create the rules.
This wizard can open using,
1. Right click on each container.
2. Click on option "Automatically Generate Rules.."
2. Click on option "Automatically Generate Rules.."
Create Rules Manually
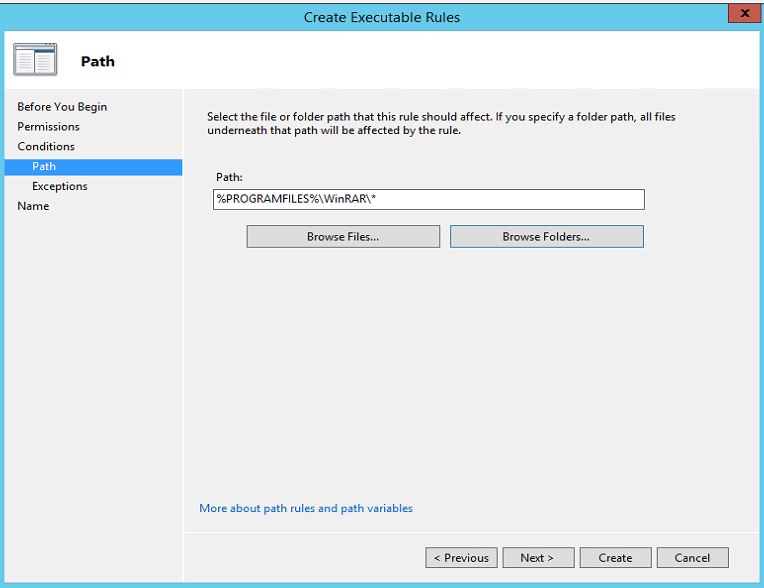
We can also create rules manually as per our requirement. I will explain the procedure with the example. In network i have WinRAR application installed in path "C:\Program Files\WinRAR". I need to block this application using APPLocker rule.
We can also create rules manually as per our requirement. I will explain the procedure with the example. In network i have WinRAR application installed in path "C:\Program Files\WinRAR". I need to block this application using APPLocker rule.
To do that i will be using the "Executable Rules" container rules.
To start the process
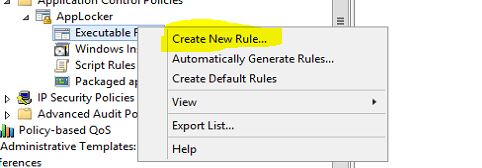
1. Right click on "Executable Rules" container
2. Select "Create New Rule…" Option
2. Select "Create New Rule…" Option
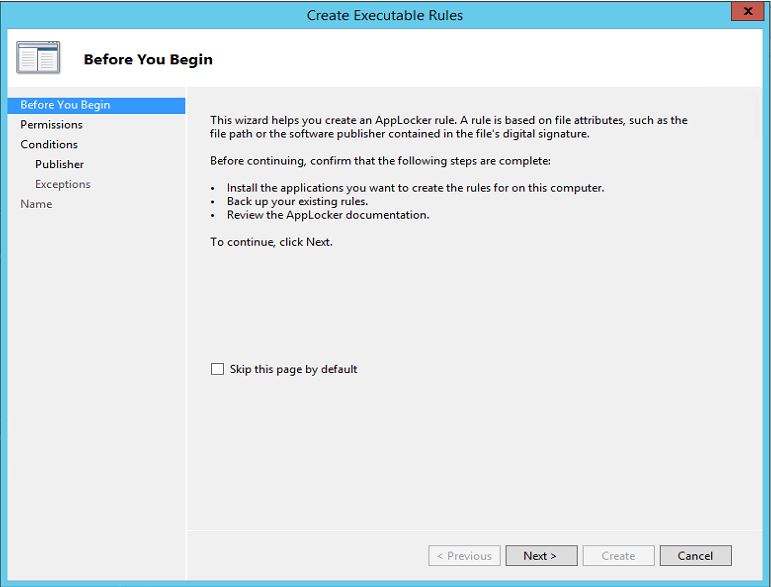
3. It will open the wizard, click next to continue
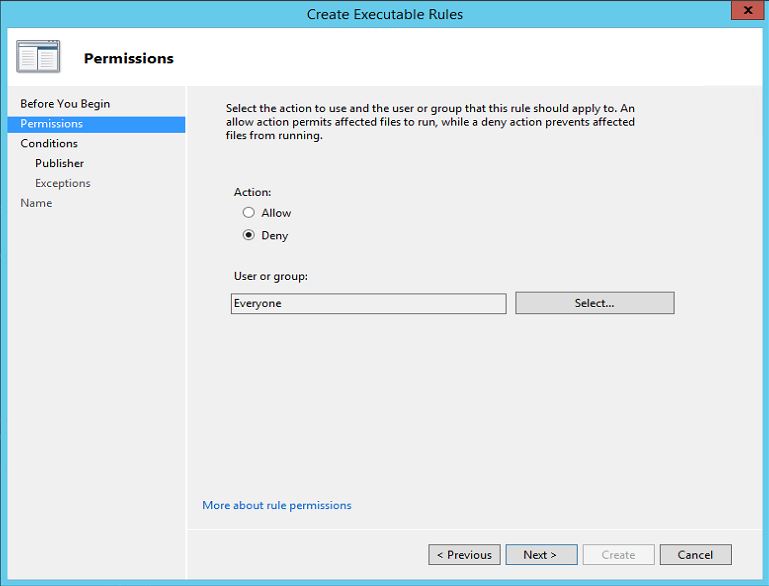
4. In next window i need to select the rule type and permissions. since i need to "deny" access the action will be "deny" and i will apply it to everyone in network
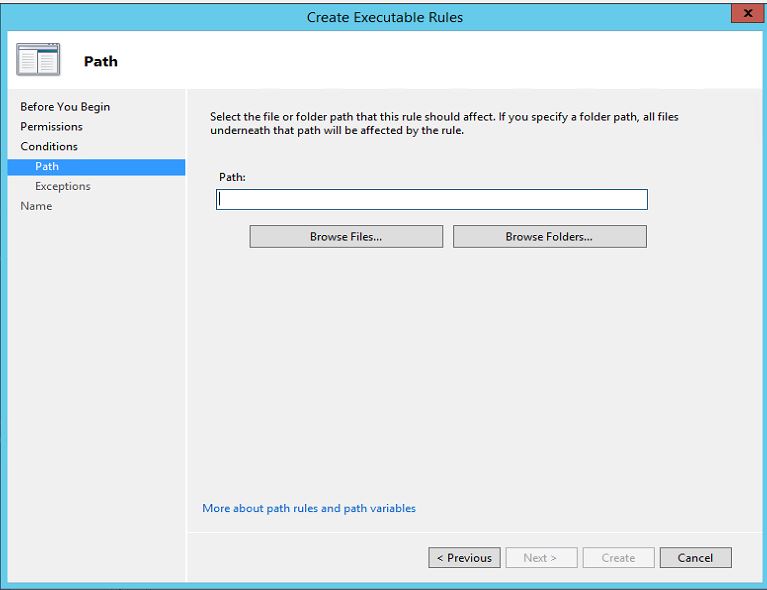
5. In next window i need to select the condition. here i will be using "Path" option.

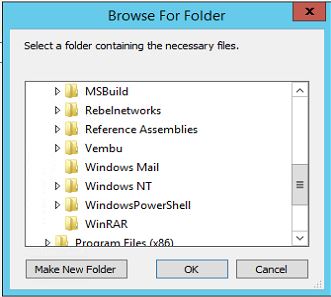
6. In next window it allows you to select the file or the folder. in here click on "Browse Folders" to select the path. once selection is done click on next to continue.
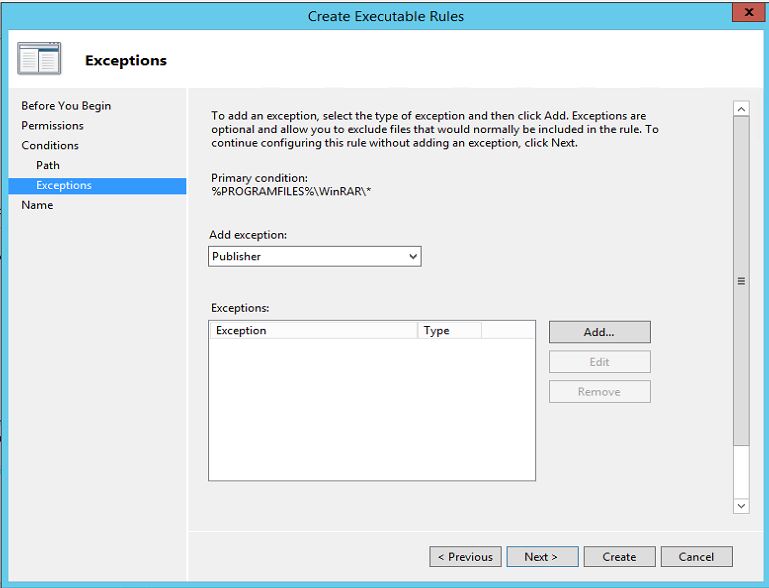
7. In next window it allows to add exception but here i will not do any modifications
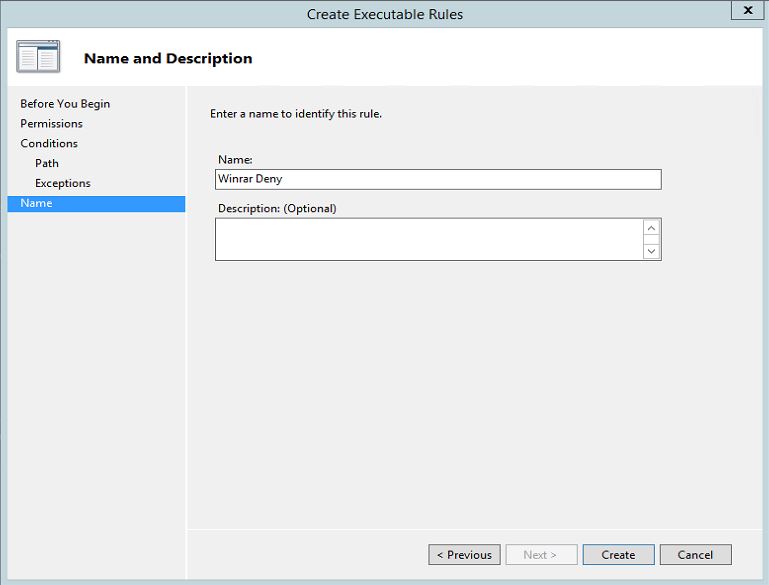
8. In next window it ask for name and we can define name to it. then once you click on create it will generate the rule.
9. Now i will try to execute the application in a pc in network which attached to the domain.
10. As soon as i double click on application shortcut it gives following error
10. As soon as i double click on application shortcut it gives following error
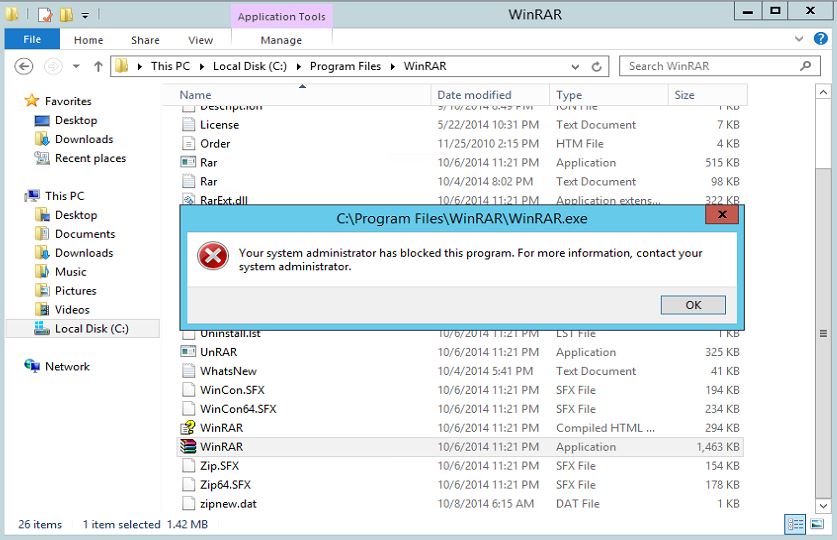
As we can see its done the trick.
This is the end off the Applocker series.
APPLOCKER PART 1
It’s been quite some time from my last post. I have been involved with a large data center migration project for last month and gave me little time to involve with the blog.
In a company environment sometime you may have requirements where you need to block certain software access, software application install. In windows xp and windows vista Microsoft introduce Software Restriction Policies (SRP) where administrators can define rules and enforce application control policies. but it’s quite been a management burden for the administrators as these rules based on "Hash rules". Hash value is a digital fingerprint which remains valid even the name or location of the executable file change. But every time software is updated new values need to be created.
With windows 7 Applocker, Microsoft gave more control over the software restriction. This is part 1 of the series of posts which explain the AppLocker and the use of it.
According to Microsoft (http://msdn.microsoft.com/en-us/library/dd548340%28v=ws.10%29.aspx) Applocker can mainly use for following,
- Prevent unlicensed software from running in the desktop environment if the software is not on the allowed list
- Prevent vulnerable, unauthorized applications from running in the desktop environment, including malware
- Stop users from running applications that needlessly consume network bandwidth or otherwise affect the enterprise computing environment
- Prevent users from running applications that destabilize their desktop environment and increase help desk support costs
- Provide more options for effective desktop configuration management
- Allow users to run approved applications and software updates based upon policies while preserving the requirement that only users with administrative credentials can install or run applications and software updates
- Help to ensure that the desktop environment is in compliance with corporate policies and industry regulations
System Requirement
Applocker can use with operating systems after Windows 7. It can be used in standalone workstations as well as in AD environment. In AD environment we can use it Group Policy to define the AppLocker rules.
Concerns
Applying application restriction rules can be a overhead for the administrators. Most of time administrators block all apps and then allowing only the required app. But you should not forget that operating system itself use different executables, scripts for its functions. If you not planned this properly it can lead in to chaos.
In AD if you going to define applocker rules, the rules are located in GPO > Policy Name > Computer Configuration > Policies > Windows Settings > Security Settings > Application Control Policies > AppLocker
In AD if you going to define applocker rules, the rules are located in GPO > Policy Name > Computer Configuration > Policies > Windows Settings > Security Settings > Application Control Policies > AppLocker
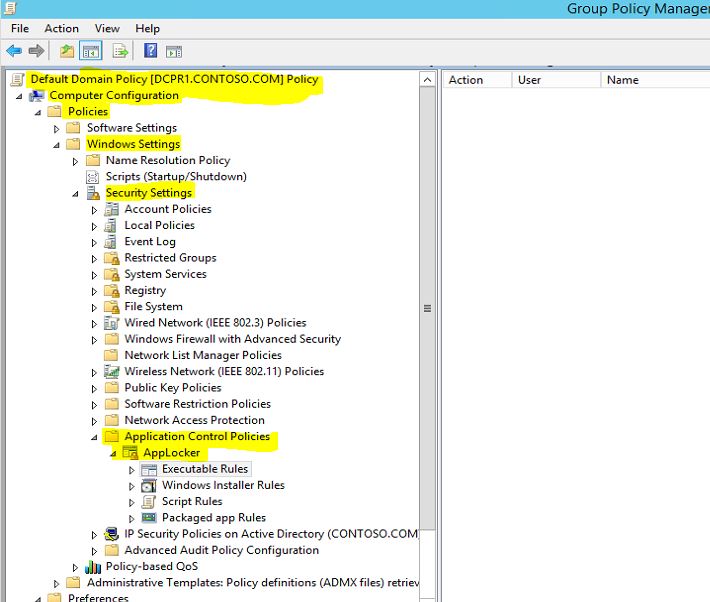
In the container there are four nodes as you can see, those are contains the different type of rules.
Executable Rules : This will contains the rules which apply with executable files. usually those apply to application files with extension .exe and .com
Windows Installer Rules : This contains the rules which apply for the windows installer packages with .msi and .msp extensions
Script Rules : This contains rules which apply to scripts files with .ps1, .cmd, .vbs, .bat, .js extensions.
Packaged App Rules : This contains rules which apply to apps which purchased through windows store.
This is the end of part 1 of the AppLocker post series.
THE DS COMMANDS – DSMOVE
In today post lets look in to another DS command which we can use to administer active directory. Today command is "DSMOVE". This is very similar to the object move from right clicking and selecting "Move" option in AD users and computers snap-in. It allows to move object from one container to another.
The common syntax will be like
dsmove objectDN -newparent targetOUDN
In here objectDN refers to the DN of the object which will need to move. targetOUDN refers to the DN of the new parent OU it will need to move in to.
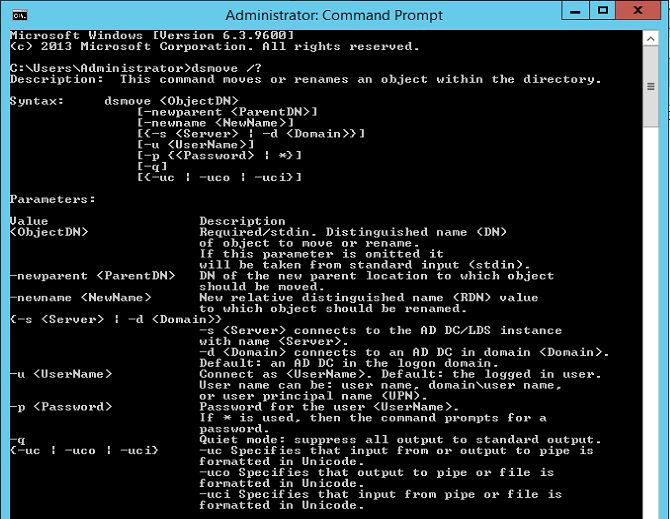
The help file will be able to open using dsmove /? and these commands need to be run using administrator privilege in DC server.
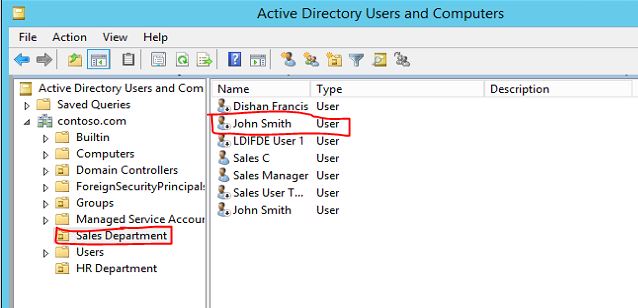
the command i will use to demonstrate this will be dsmove "CN=John Smith,OU=Sales Department,DC=contoso,DC=com" -newparent "OU=HR Department,DC=contoso,DC=com" , it will move the user John Smith from Sales Department OU to HR Department OU. Lets check the object before move.
Lets run the command and see.
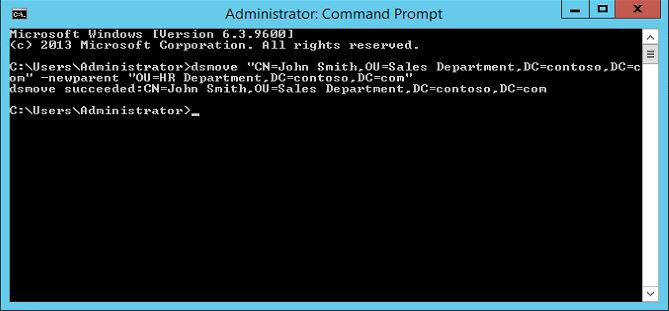

So according to it were able to successfully move the object from one OU to another.
This is the end of this post and lets look in to another DS command in next post.
THE DS COMMANDS – DSRM
In today post lets look in to another DS command which we can use to administer active directory. Today command is "DSRM". This command is using to delete object/objects from active directory. when use this command need to be extra careful because when it deletes the object. The new dsrm utility (server 2012) ask for the confirmation before it delete objects. but before it was very dangerous before as it doesnt ask for confirmations.
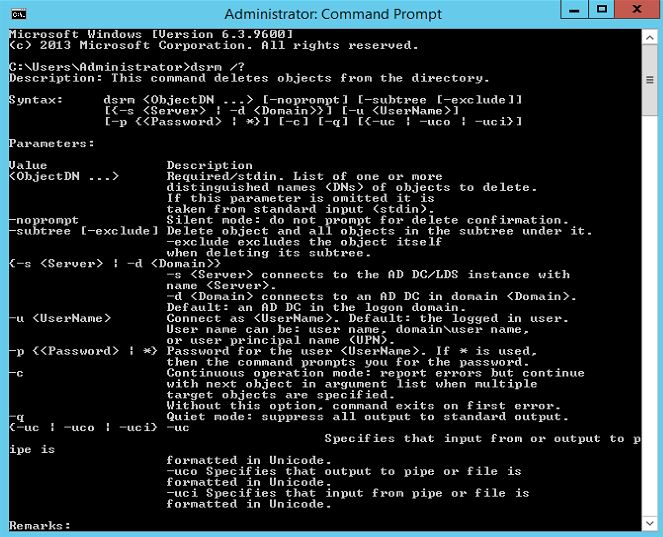
The command syntax for the command is
dsrm objectDN
Note that dsrm command doesn't takes the object type. it need full DN path for the object. it is actually good as it prevent the data lose that can happen, if we take dsquery if you just enter the command with object type it will list all the records related to that object type. if its same with dsrm it may delete all the objects related to given type. but still we need to be careful when using the DN even specially when you define the containers. if you submit the command with container (OU) it will also delete all the objects inside it and OU it self as well. there for double check the command before you press enter.
DSRM command help file can open using dsrm /? This commands needs to run as administrator in DC server.
Lets look in to some sample commands to use with this command.
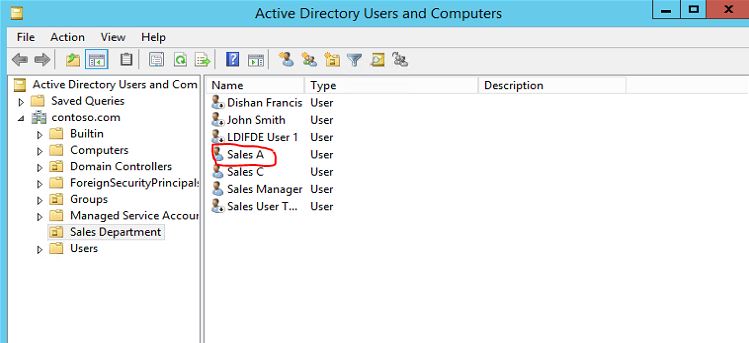
As demo i will use dsrm "CN=Sales A,OU=Sales Department,DC=contoso,DC=com" This will remove the User account called "Sales A". lets confirm the object is there before execute the command for verifications.
Lets run the command
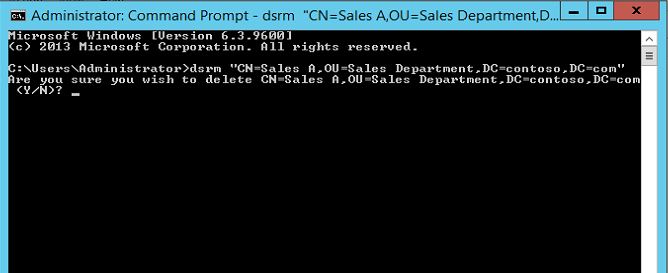
As you can see it ask if you are wish to delete this object. type "y" and enter to accept the object removal.
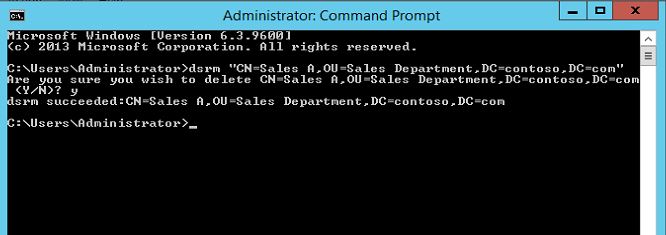
It confirms the object removal. lets go and see if the object is gone from AD.
This confirms its been removed from AD.
DSRM also can pipe with other DS command such as DSquery to run a query and deletes its outcome. for example if i do not know the DN path i can query for user account using dsquery command and then tell it to remove the result objects it gives.
This is the end of this post and lets look in to another DS command in next post.
THE DS COMMANDS – DSMOD
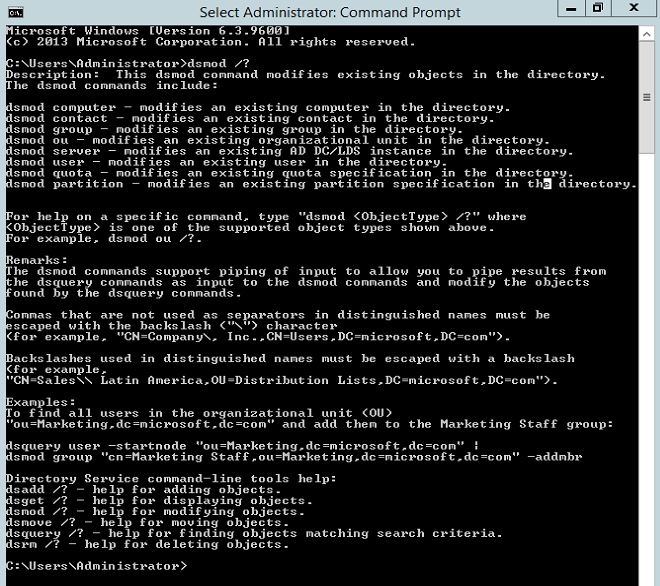
In today post lets look in to another DS command which we can use to administer active directory. Today command is "DSMOD". This command is use to modify the attributes of a object. For example lets assume we need to edit the attributes like Display name, Department of an object or a group of object. This command can easily use for the task.
Another advantage of this command is you can use it combine with DSQuery command. so you can simply search the object and modify the attributes of results it passes.
The common syntax for the command is
dsmod objecttype "ObjectDN" -attribute "New Value"
in here objecttype describe the type of the object. for example if its user account the object type will be user. ObjectDN defines the DN of the object which going to modify. attribute defines the attribute which will be modify.
The help file of the command can be open using dsmod /? and these command need to be run as administrator on DC server.
Lets look in to some of examples using this command.
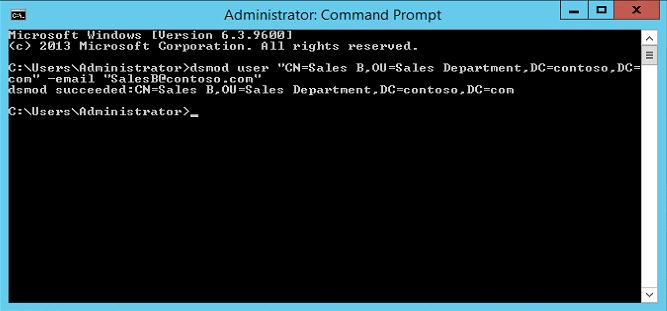
The first command i am using is dsmod user "CN=Sales B,OU=Sales Department,DC=contoso,DC=com" -email "SalesB@contoso.com" in here i am going to edit the "Email" attribute of the user Sales B and add email address SalesB@contoso.com. before run the command lets check and verify the existing attribute values.
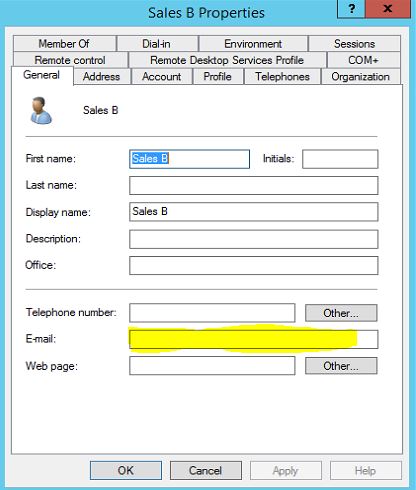
as we ca see it is empty. lets run the command now and see the outcome.
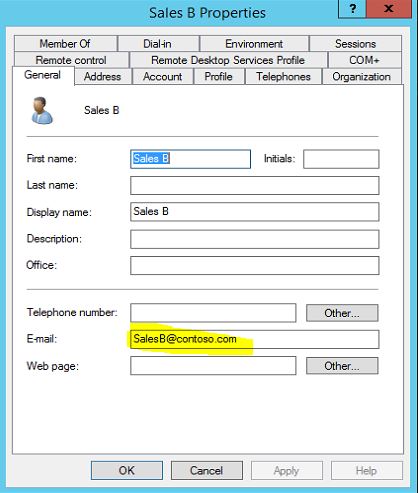
as we can see it successfully updated the attribute.
Also as i mentioned earlier in the post we can use this command along with the DSquery command. lets look how we can use it.
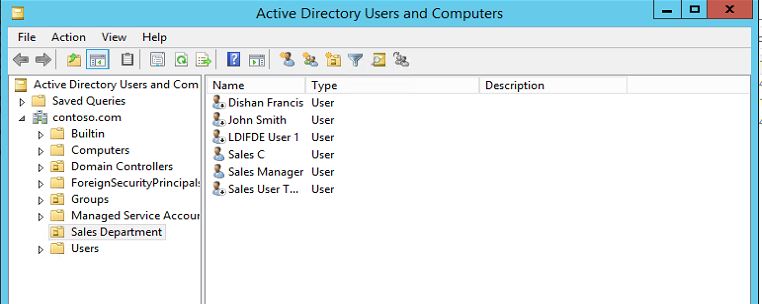
as per demo i will be using dsquery user -name "Sales*" | dsmod user -dept "Sales Department". on this command it will first query all the users who starts the name with text "Sales" and modify the department attribute of all of them and add Sales Department
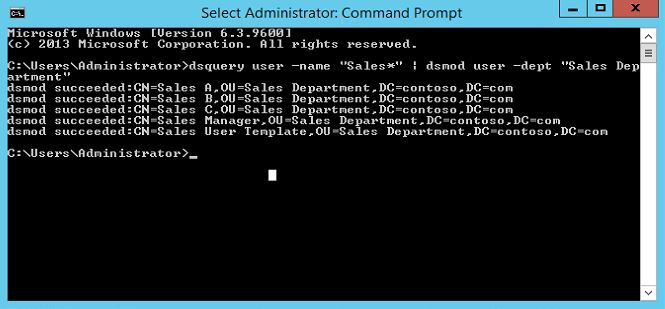
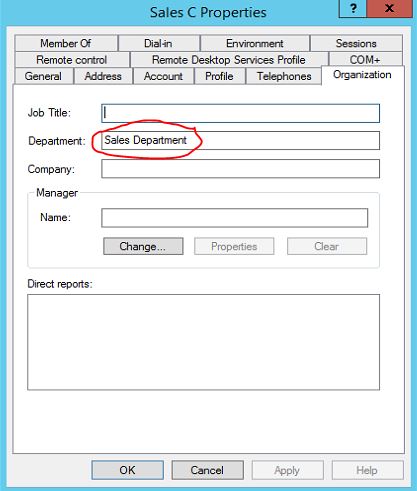
According to above it successfully modify 5 user objects and we can see its applied on user account Sales C as expected.
This is the end of this post and lets look in to another DS command in next post.
THE DS COMMANDS – DSGET
In today post lets look in to another DS command which we can use to administer active directory. The command is "DSGET" it is also use to query about AD objects.
What is different between DSQUERY and DSGET ?
When you run DSquery you can get set of objects as results. for example if you need to list all the users starts name with "Sales" you can use DSquery command to list similar objects and find the exact object you need. but DSget use to list properties of a object. for example if you need to fine email address of user "Sales A" you can use DSget command for it. But to do that you need to know Distinguish Name (DN) of the object. So this is the reason why this command less popular among engineers.
DSGET Hlp file can open using dsget /? This commands need to be run as administrator on DC server.
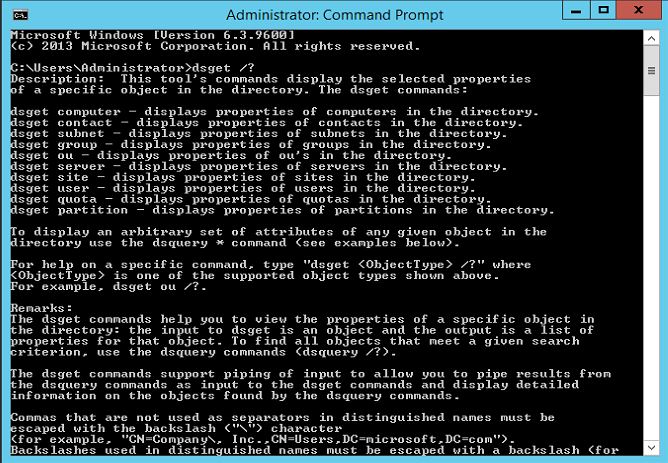
Lets look in to some of examples,
The first sample command i will use is dsget user "CN=Sales A,OU=Sales Department,DC=contoso,DC=com" -email. in here dsget user defines that the query is going to based on object type Users. so in this i am trying to find email address of the Sales Auser. CN=Sales A,OU=Sales Department,DC=contoso,DC=com is the DN for the user Sales A.
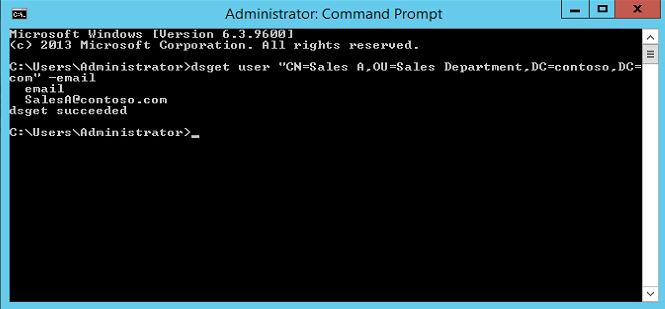
As it is showing on the above it is display the email address of the user as the result.
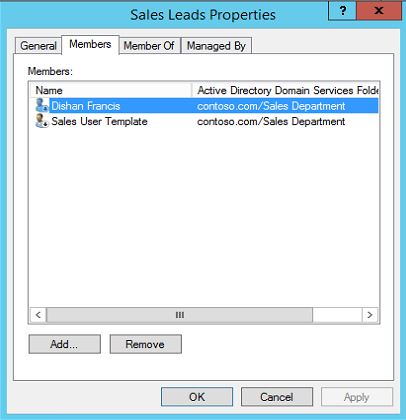
The next sample command is dsget group "CN=Sales Leads,OU=Groups,DC=contoso,DC=com" -members, This is for list all the members of the Ad user group called "Sales Leads" , in command dsget group defines the object type as group and CN=Sales Leads,OU=Groups,DC=contoso,DC=com is the DN for the user group.
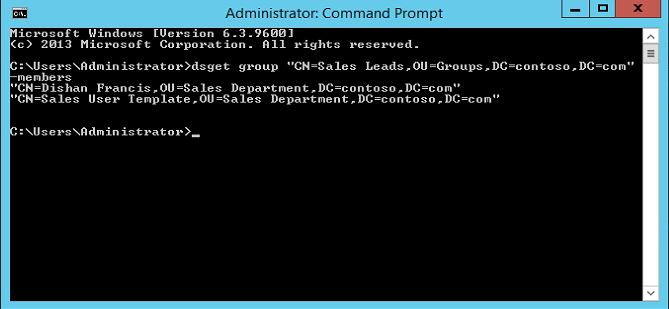
According to the command it list down the 2 users in the group successfully.
This is the end of this post and lets look in to another DS command in next post.
THE DS COMMANDS – DSQUERY
In last few posts i have explained different tools, techniques which can use to query about AD objects. in there mostly we used GUI tools. But there is a command line utility which can use to perform almost all tasks which you can do using Active Directory Users and Computers Snap-in. But some one may think why its needed to use complex commands to do such while you having GUI tools. But this command line utility is giving more control over the AD tasks. you can execute few tasks together which you may have to do by few steps in GUI. For example you can search for a object and same time can edit info in search results. Most of commands use for this begins with letter "DS" so these are more often refer as "DS commands".
DSQuery – This is works similar to "Find" function in AD users and computers snap-in. It can use to query objects based on the parameters which is provided and list the matching objects.
The help file of the command can view by passing dsquery /? This command have to run as administrator in AD server.

The basic form of the command is
dsquery objecttype
Object type can be : user,computer,group,ou
by default search scope is the entire domain but this can be change by defining the container.
-limit specifies the number of results it returns. the default value is 100 entries. if you pass value 0 means return all values. in queries it allows to use wildcard (*)
lets look in to few of examples.
as first query i am going to use dsquery user -name "Sales*" This will search for the all the user names which starts with text "Sales" and list them all.
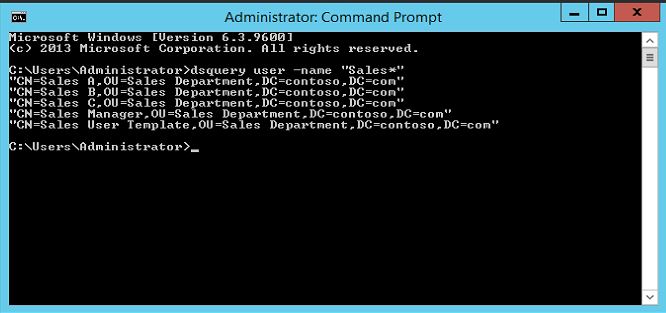
It has list down all the info in Distinguished Name (DN) format. This listed all the users who starts with name "Sales" we also can specify the exact data as well. for example dsquery user -name "Sales A" This will search for the exact value and list it down. if its cannot find it it will pass empty line.

As i mentioned before by default the search run against entire domain. but we can still define the container it should run against.
dsquery user "OU=Sales Department,dc=contoso,dc=com" -name "Sales*" in this query its define the search scoop and it will only run it against OU=Sales Department,dc=contoso,dc=com

This is the end of this article and in next few articles i will explain other DS commands which can use.


No comments:
Post a Comment