Pages

Showing posts with label Windows Server Migration Tools. Show all posts

GUIDE TO MIGRATE ACTIVE DIRECTORY CERTIFICATE SERVICE FROM WINDOWS SERVER 2003 TO WINDOWS SERVER 2012 R2.


Microsoft has already announced that windows server 2003 / windows server 2003 R2 versions support is coming to end in 14th July 2015 (http://support2.microsoft.com/lifecycle/search/default.aspx?sort=PN&alpha=Microsoft+Windows+Server+2003&Filter=FilterNO). It’s no wonder that some organizations still uses windows server 2003 versions in production environment.


If you still not plan for migration from legacy windows server versions, well time has come!!
This guide will explain how we can migrate AD CS from windows server 2003 to windows server 2012 R2.
In this demonstration I am using following setup.
Server Name
Operating System
Server Roles
canitpro-casrv.canitpro.local
Windows Server 2003 R2 Enterprise x86
AD CS ( Enterprise Certificate Authority )
CANITPRO-DC2K12.canitpro.local
Windows Server 2012 R2 x64
-
Backup windows server 2003 certificate authority database and its configuration
•    Log in to Windows 2003 Server as member of local administrator group
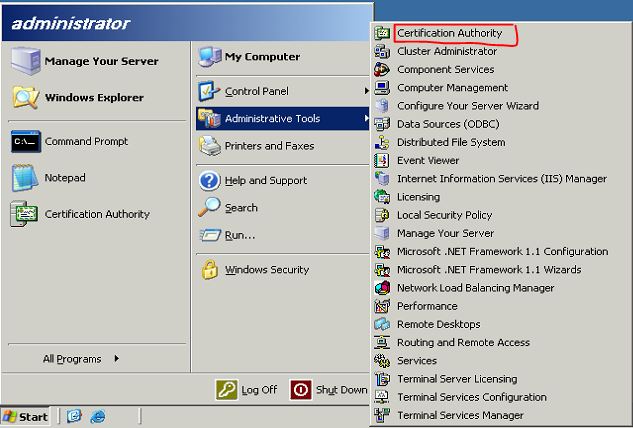
•    Go to Start > Administrative Tools > Certificate Authority
adcs1
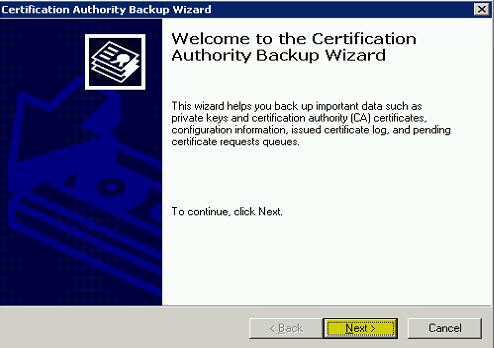
•    Right Click on Server Node > All Tasks > Backup CA
adcs2
•    Then it will open the “Certification Authority Backup Wizard” and click “Next” to continue
adcs3
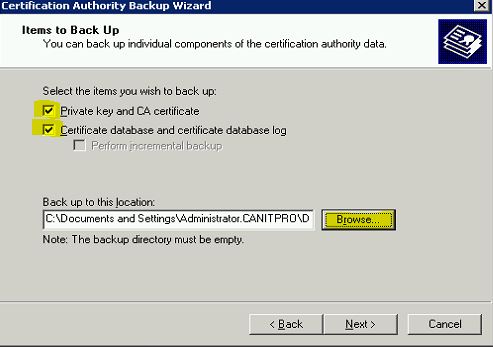
•    In next window click on check boxes to select options as highlighted and click on “Brows” to provide the backup file path location where it will save the backup file. Then click on “Next” to continue

GUIDE TO MIGRATE DHCP FROM WINDOWS SERVER 2003 TO WINDOWS SERVER 2012 R2 USING WINDOWS SERVER MIGRATION TOOLS

Microsoft has already announced that windows server 2003 / windows server 2003 R2 versions support is coming to end in 14th July 2015 

It’s no wonder that still organizations using windows server 2003 / windows server 2003 R2 in their infrastructure with different server roles.
With windows server 2008 R2 Microsoft has introduce new great feature called “Windows Server Migration Tools” which will  allow administrators to migrate server roles, features, configuration settings seamlessly from one system to another(ex- windows server 2003). Windows server 2012 also includes this feature and in this article I will demonstrate how we can use it to migrate DHCProle to windows server 2012 r2.
Please note, To use this method we need to install this feature in both source and destination servers.
For the demonstration I am using following setup

Server Name
Operating System
Server Roles
Networks
dhcp-2k3.canitpro.local
Windows Server 2003 R2 Enterprise x86
DHCP
Network A – 10.10.10.0
Network B – 172.16.25.0
Network C – 192.168.148.0
CANITPRO-DC2K12.canitpro.local
Windows Server 2012 R2 x64
-
-
Before start the migration process it’s important to consider on following.
1)    To migrate the roles you need to log in to source and destination servers as “Domain Administrators”. 
2)    Before start the migration process make sure source and destination servers’ runs with latest updates and service packs. 
3)    If the source server runs with multiple network, multiple NIC make sure the destination server also have same number of NIC so it can be server with same network setup.
dhcp-2k3.canitpro.local server currently setup with 3 additional NIC to represent network A,B and C. those have configured with static ip addresses to match with relevant network it belongs to. The DHCP server host different DHCP scopes for each network.
Before we start the process we need to install the following software in windows server 2003(dhcp-2k3.canitpro.local) if it’s not there already.
Install Windows Server Migration Tools in windows server 2012
1)    Log in to the Windows server 2012 as Domain Administrator
2)    Go to Server Manager > Add Roles and Features
dmig1
3)    It will open the Add roles and features Wizard and click next to start the process
4)    In next window, for the installation type select “Role-based or feature-based installation”  then click next to continue
dmig2
 

RECENT ARTICLES

Recent Articles

BLOG CONTENTS